“If there is only one way, then I must take it. What comes after must come.”
-Frodo Baggins, The Two Towers
Threat Level 32
Our large party of intrepid adventurers rises at dawn. Beravor and Theodred still nurse two wounds each; Eowyn remains healthy. Among our five allies, the two cousins Faramir have one wound each, while the other three — Miner of the Iron Hills, Erebor Hammersmith and the spy Henamarth Riversong — are all healthy.
In the staging area await only the Wargs. There is no current location, and we have 9 progress tokens out of 16 on the current quest. The party is not currently engaged with any enemies. In our hand — only four cards: Sneak Attack, Hasty Stroke, Lore of Imladris, and Forest Snare.
Resource Phase
Adding resources to our heroes leaves Eowyn with just one, Theodred with eight after tapping his Steward of Gondor attachment, and Beravor with two. We draw a card — another Steward of Gondor, which is nice but not the sort of help we need at this point in the adventure.
Since we are relatively low in cards in our hand, we exhaust Beravor to draw two more cards, bringing us another ally and an event:
Planning Phase.
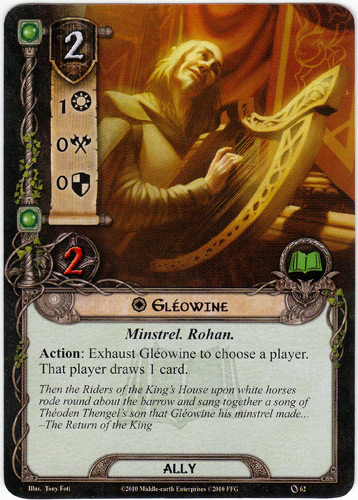
Theodred pays two to place the second Steward on Eowyn. We immediately tap the Steward to give Eowyn two more resource tokens, to be used for future events. Beravor spends her two to summon Gleowine as a sixth ally in our party.
Before questing, we exhaust the spy Henamarth to look at the top card in the encounter deck. The news is bad:
Yikes! This card has a threat level of five, meaning the threat level in the quest phase will be at least seven (adding in the Wargs’ two). We must proceed with caution.
Quest Phase
.
First, we tap Beravor’s Unexpected Courage attachment to ready her. We then commit a whopping five party members to the questing: our three heroes, along with Faramir I, and Erebor Hammersmith. We then tap the second Faramir to add one willpower to each of the five:
Eowyn= 4+1
Theodred= 1+1
Beravor= 2+1
Faramir I= 2+1
Hammersmith= 1+1
…for a total of 15 willpower. We are thus more likely to make progress despite the strong threat level we know we’ll face.
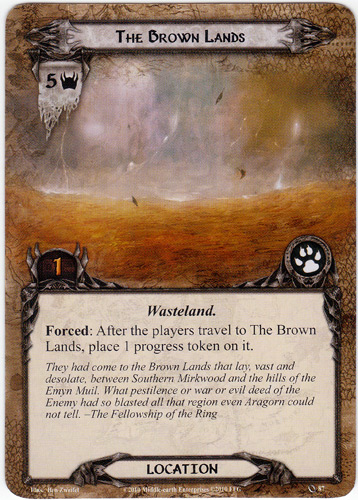
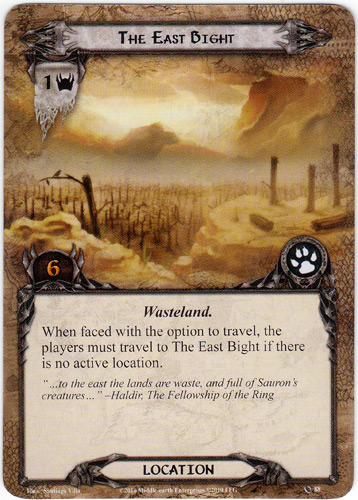
After committing we draw the two required cards: the Brown Lands and another location: East Bight, with a threat of only one.
Quest Resolution:
The math is in our favor: 15 willpower minus 8 total threat gives us 7 progress — enough to close the current quest, Anduin Passage. We immediately move to the third and final quest stage in this journey, “Ambush on the Shore”:
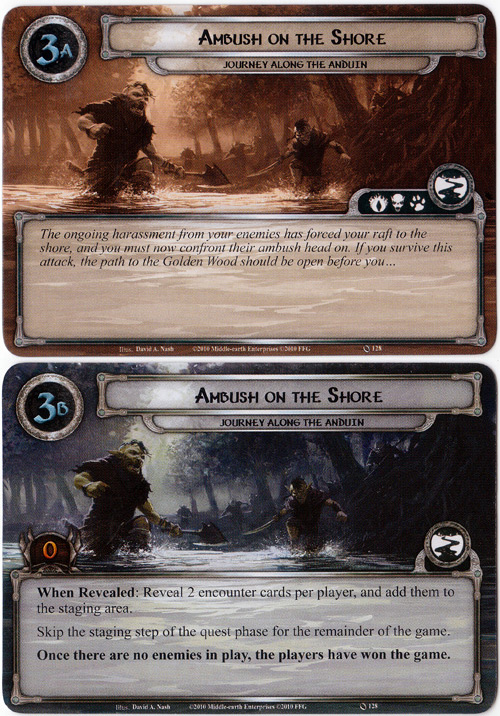
The ongoing harassment from your enemies has forced your raft to the shore, and you must now confront their ambush head on. If you survive this attack, the path to the Golden Wood should be open before you…
Like the previous stage, this third stage changes the rules slightly:
Reveal 2 encounter cards per player, and add them to the staging area.
Skip the staging step of the quest phase for the remainder of the game.
Once there are no enemies in play, the players have won the game.
Following these instructions, we draw the two final encounter cards:
Note — Wolf Rider has the surge effect, which forces us to draw a third encounter card:
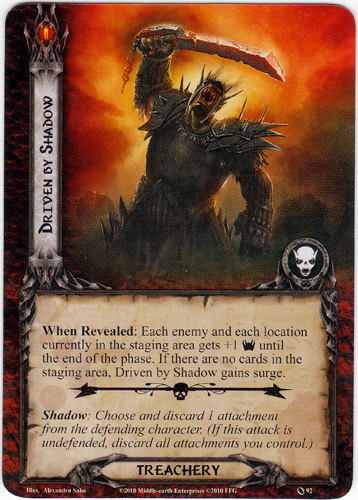
Because this treachery appeared now, rather than prior to questing, its ‘When Revealed’ effect is moot, and we happily discard it.
Where does all this leave us? The end of the Journey Down the Anduin is in sight, our party is large, but we have two heroes with serious wounds and three difficult enemies to defeat.
Travel Phase:
We have two locations in the staging area but the East Bight requires us to travel there first.
Combat Phase:
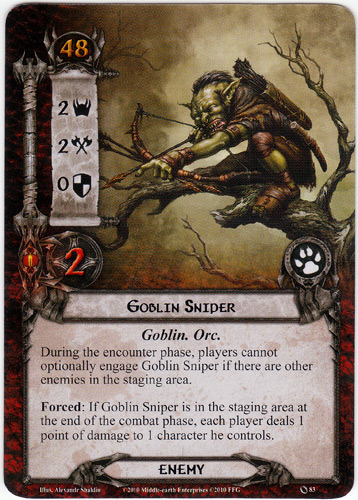
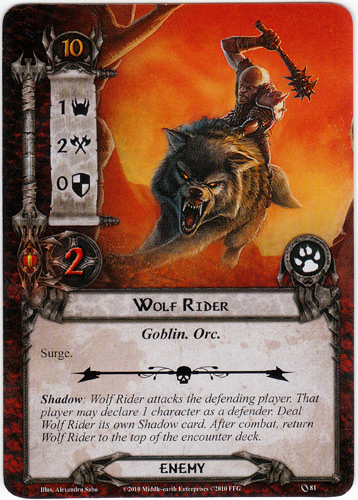
Again, we have no choice, we must engage with the Wargs (again, sigh) and the Wolf Riders. We could choose to engage with the fearsome Goblin Sniper, but there is no reason to rush things. The Sniper will remain in the staging area.
But we used five party members for questing. We tapped the special powers of a Faramir and the spy Henamarth. That leaves only Miner of the Iron Hills and Gleowine. Alas, as you can see above, Gleowine has no attack or defense, leaving her useless for battle.
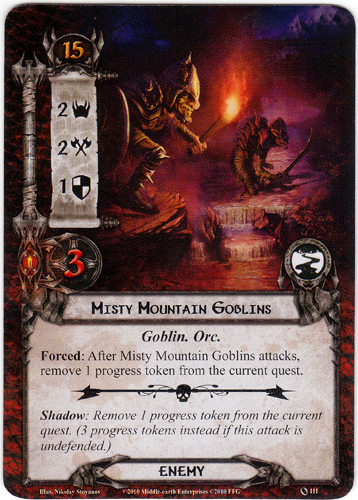
In the first battle, we defend against the Wargs with the redshirted Miner. The shadow card is drawn:
The MMG’s shadow effect is moot, as we fortunately have just started the third quest stage and have no progress on it. Thus, the Wargs kill the Miner but scurry back to the staging area for the third straight day.
In the second battle, we opted not to sacrifice Gleowine. No redshirt she. Instead, the attack is undefended. The shadow card is another Misty Mountain Goblin, its effect is again moot. The two damage dealt by the Wolf Riders is applied to the sole hero who thus far has no wounds: Eowyn.
But wait: more damage is to come: note the ‘Forced’ language on the Goblin Sniper:
Forced: If Goblin Sniper is in the staging area at the end of the combat phase, each player deals 1 point of damage to 1 character he controls
So we deal one point of damage on Theodred, whose hit points are down to just one out of four.
And thus, the 10th day comes to a close with all three heroes facing serious wounds. The end is in sight, but it is possible not all will survive to see the conclusion of this most dangerous journey.